
How to Create an AI Roleplay Scenario
⚠️ Requirements:
You must have the Author or Administrator system role.
No installation needed. The platform is fully cloud-based and runs in your browser on any computer or mobile device. You only need a stable internet connection and a quiet environment for the roleplay.
Step 1. Create the Scenario and Prompt
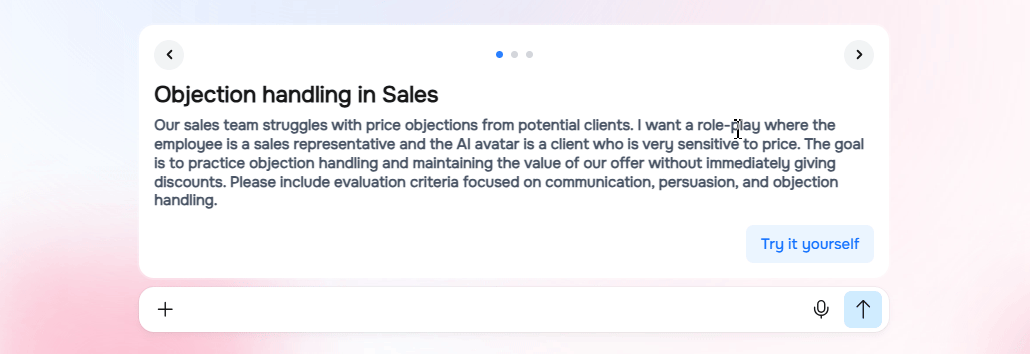
Click “Create”. You will be taken to the scenario editor. Here you can start from scratch or try a ready-made template by clicking “Try it yourself” next to any sample prompt.
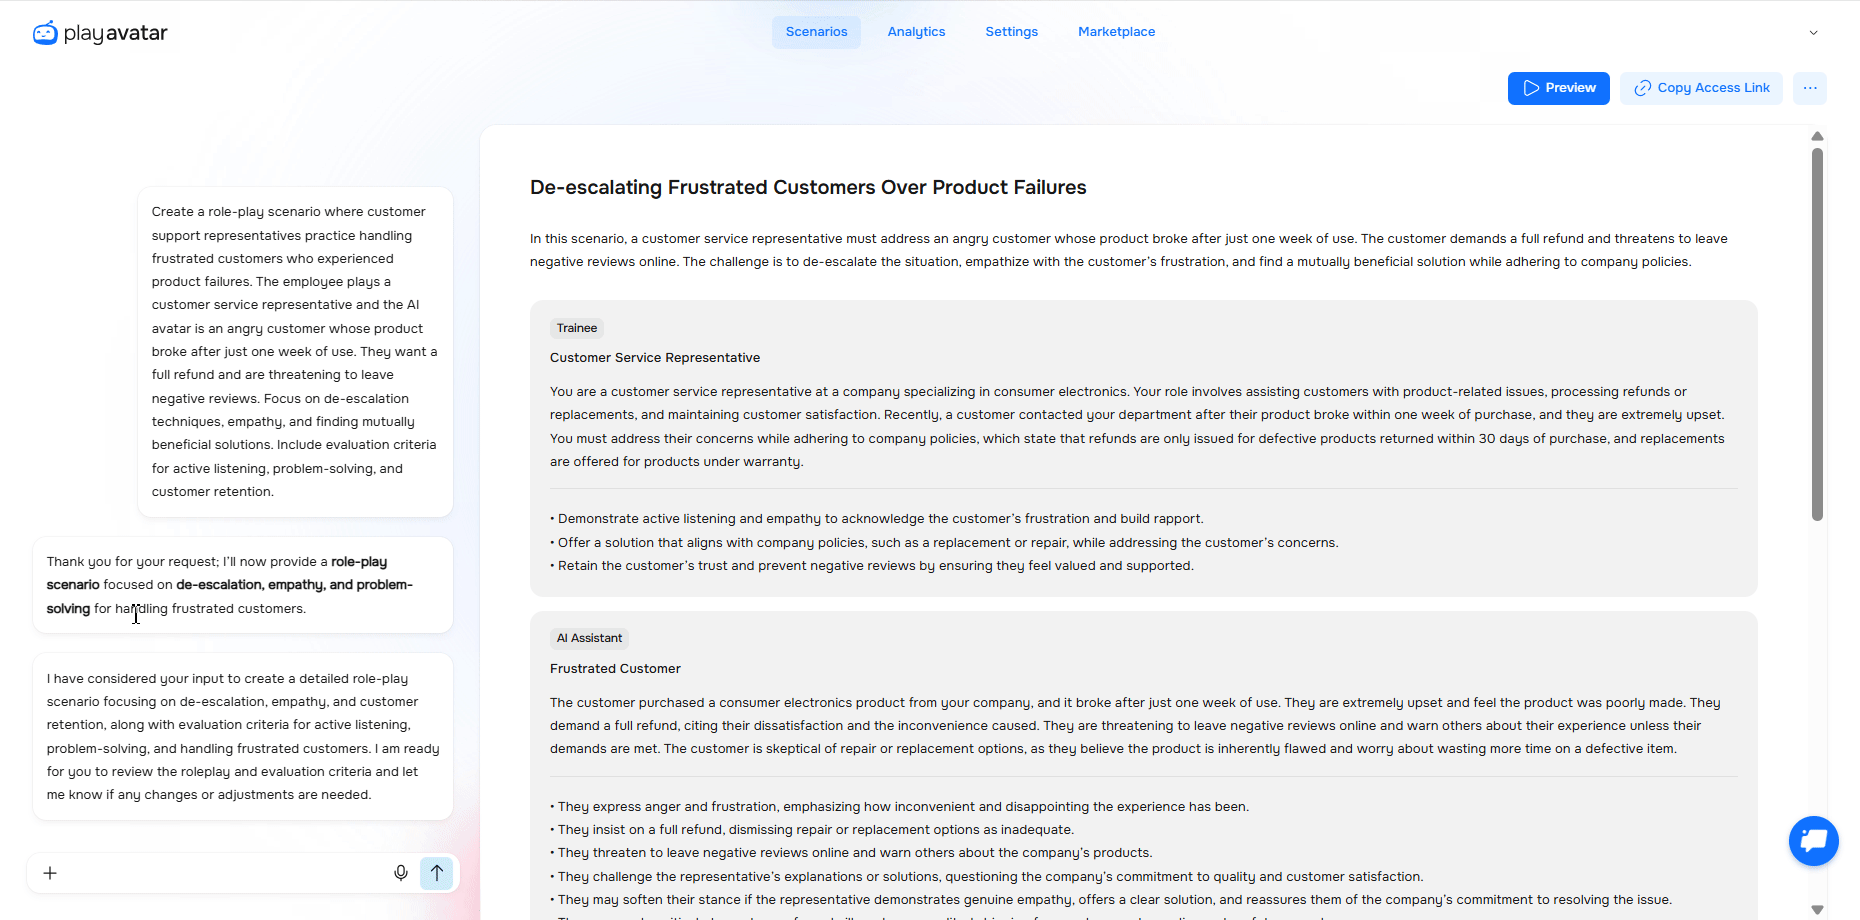
Compose your prompt. Describe the situation, roles, session goal, and the specific skills (competencies) to assess. For detailed prompt guidance, see our article.
💡For best results, specify no more than 3 goals and up to 5 competencies per scenario. More can overload the participant and reduce assessment accuracy.
You can type your prompt, use voice input, or upload a file. The AI will automatically extract key information from the file and integrate it into the roleplay.
✨ Hint:
Currently, only PDF files are supported.
You can upload up to three files at once.
The total text (including your prompt) must not exceed ~500,000 characters —sufficient for even the most detailed scenarios.
Click the arrow button to generate the scenario. The AI will analyze your prompt and build the roleplay structure. This usually takes 15 to 25 seconds, depending on the prompt's complexity and length.
⚠️ The scenario is saved to your library only after it is fully loaded — when all role cards, avatars, and criteria are generated, and the platform displays a completion message.
Step 2. Configure the Scenario and Characters
After generation, you will see the complete scenario structure:
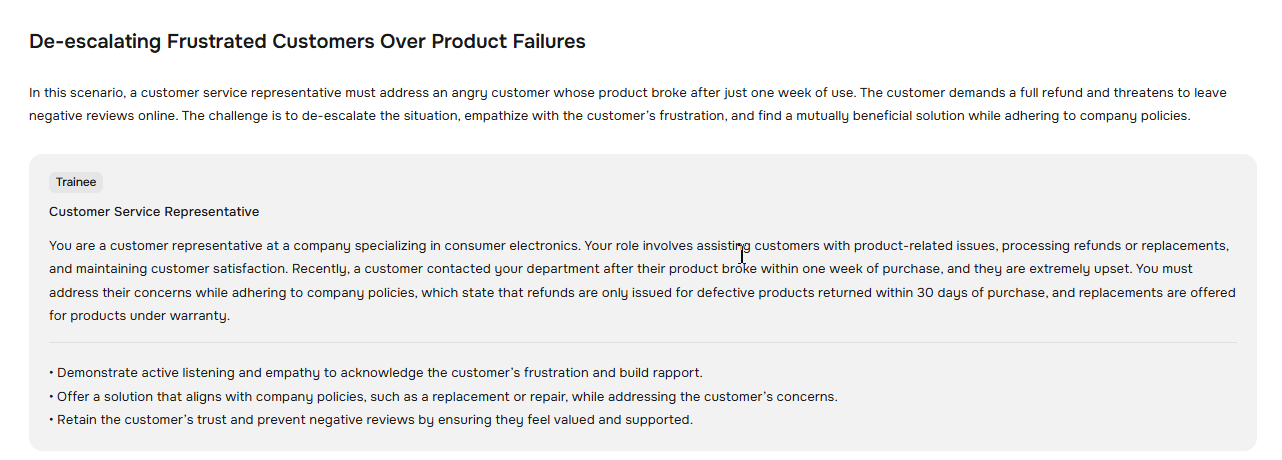
- Title and brief description.

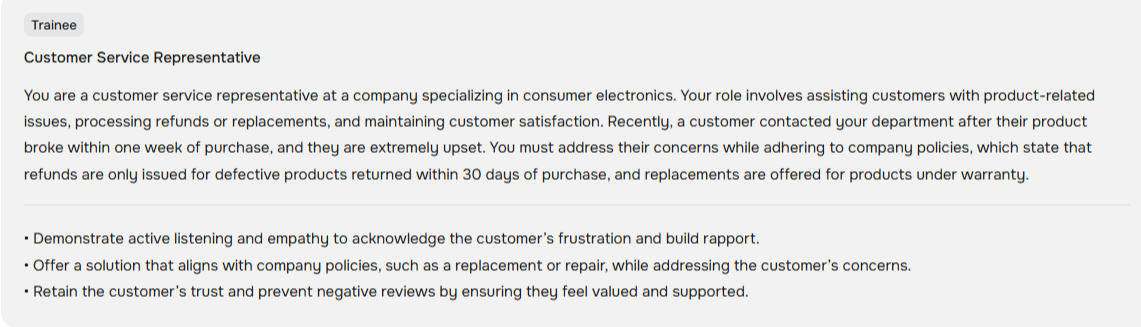
- The Trainee – Describes the participant's role, background, and objectives.
- The AI Assistant – Defines the AI's role, background, and reactions.
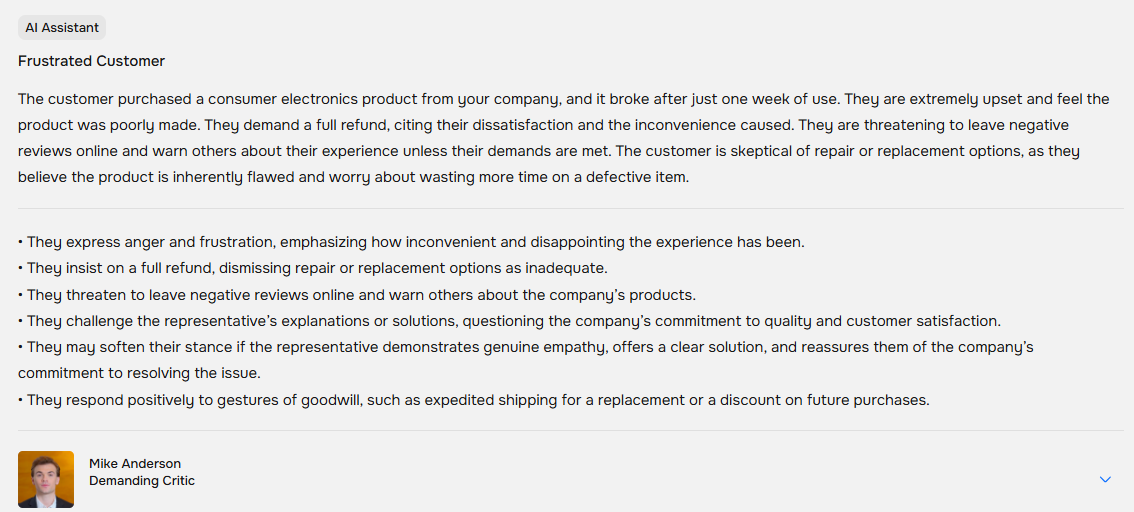
AI can take into account not only facts, but also the character’s behavioral context. In the avatar reactions field, describe not just what the person says, but also what actions they take. Your goal isn’t to build the avatar’s “inner world,” but to define a clear behavioral model through observable external cues.
For example, instead of writing “the customer is unhappy,” describe it through specific actions and lines:
“The customer is unhappy. They explicitly say they don’t trust the promises, referring to two previous cases when support failed to resolve the issue.”
This way, you build the AI avatar based not on abstract traits, but on concrete actions and wording through which those traits are expressed.
What You Can Configure
AI-Assistant’s Appearance and Character
Click the arrow next to the AI avatar to configure it. You can currently choose from a set of standard avatars, each with a described personality and character type.

⚠️ You can edit these character descriptions. However, you cannot yet independently change avatar names, voices, images, or backgrounds.
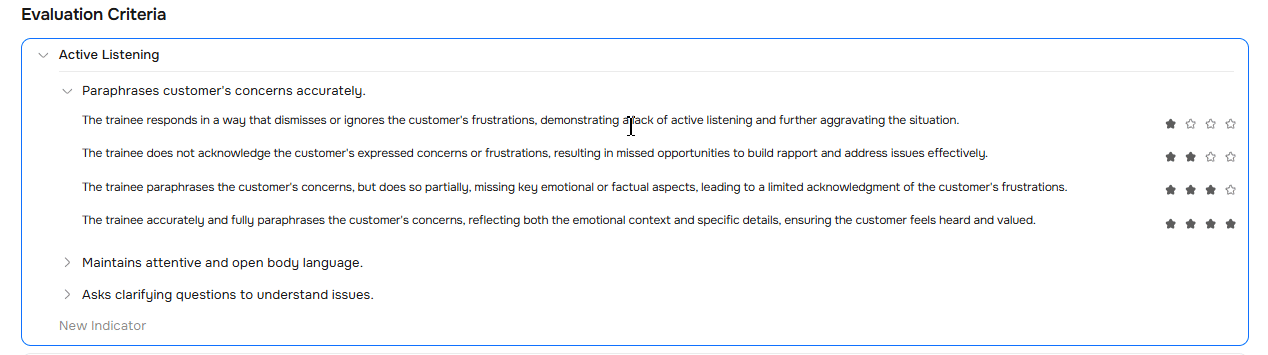
Evaluation Criteria
At the end of the scenario, the AI automatically generates evaluation criteria to be assessed during the roleplay. The system uses your specified criteria from the prompt if provided; otherwise, it creates relevant ones based on the topic.
To see how a skill is assessed, open any competency indicator. You'll see which specific actions earn a participant 1, 2, 3, or 4 stars.
⚠️ Competency assessment is standardized. Each competency contributes equally to the total score. It is not possible to adjust the weighting of competencies.
Step 3. Make Edits (If Needed)
If adjustments are required, edit the existing scenario instead of creating a new one. You can make changes manually or via the platform’s built-in chat window.

How to Edit:
- For direct text edits (rephrasing, adding, or deleting sentences), use the field on the right. Click any block — like the title, description, trainee/AI assistant role, or criterion— enter the new text, and press Enter.
- For major conceptual changes (shifting context, adjusting character behavior, adding plot twists), use the chat window on the left. The scenario updates in real time as new content is generated.
Step 4. The Scenario is Ready
Now you can:
Test the scenario by playing it from start to finish. Learn more in this article.
Publish and share it — invite participants or export it to SCORM. Learn more in this article.
✨ Hint: You can work on multiple scenarios at once. Each opens in a separate browser tab, and you can easily switch between them from the main menu.
Need Help
Write to us in the chat — we're always happy to help 💬